The thumbnail cache (as well as the icon cache) are stored in the following folder: C:\Users\Your_Username\AppData\Local\Microsoft\Windows\Explorer Note: Replace Your_Username with the actual username of the account. Now the problem is that Windows seems to automatically delete the thumbnail cache file after every restart or shut down which creates a problem for users. When you open a folder containing hundreds of files then it will take a lot of time to generate thumbnails as the previous thumbnail cache file may have been deleted on system shut down. The main problem seems to be caused by Automatic Maintenance where a task called SilentCleanup is causing the thumbnails to be deleted on every boot. It is also possible that the issue can be caused by other reasons such as Corrupt thumbnail cache folder, Disk Cleanup utility etc. Also, some 3rd party app can delete thumbnail cache files on every boot, so without wasting any time let’s see How to Stop Windows 10 from Automatic Deleting Thumbnail Cache with the help of the below-listed tutorial.
Stop Windows 10 from Automatic Deleting Thumbnail Cache
Make sure to create a restore point just in case something goes wrong.
Stop Windows 10 from Automatic Deleting Thumbnail Cache Method 1: Prevent Windows 10 from Automatic Deleting Thumbnail Cache Method 2: Disable the SilentCleanup Task in Task Scheduler Method 3: Try to Reset Thumbnail Cache Folder Method 4: Stop 3rd Party Software from Deleting Thumbnail Cache
Method 1: Prevent Windows 10 from Automatic Deleting Thumbnail Cache
1.Press Windows Key + R then type regedit and hit Enter to open Registry Editor.
2.Navigate to the following registry key: 3.Now select Thumbnail Cache then in the right window double-click on Autorun.
Note: If you can’t find the Autorun DWORD then right-click on Thumbnail Cache select New > DWORD (32-bit) value and name this DWORD as Autorun. Even if you’re on a 64-bit system, you need to still create a 32-bit DWORD.
4.If the value of Autorun DWORD is set to 1 then it means the SilentCleanup feature is enabled which automatically deletes the thumbnail cache on every boot.
5.In order to fix this issue simply double-click on Autorun and change it’s value to 0 then click OK.
6.Similarly, navigate the following registry key:
7.Double-click on Autorun DWORD and change its value to 0 then click OK.
Note: If you can’t find the Autorun DWORD, simply create on as you did in step 3.
8.Close Registry Editor then reboot your PC. 9.You can still clear thumbnail cache by using Disk Cleanup manually.
Method 2: Disable the SilentCleanup Task in Task Scheduler
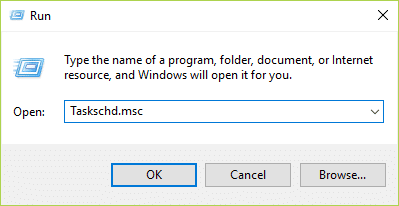
Note: This will prevent Disk Cleanup from running as a part of Automatic Maintenance. If you want to run Disk Cleanup as part of scheduled maintenance but don’t want it to clear the thumbnails cache then method 1 is preferred. 1.Press Windows Key + R then type taskschd.msc and hit Enter.
2.Navigate to the following location: Task Scheduler > Task Scheduler Library > Microsoft > Windows > DiskCleanup 3.Make sure to select DiskCleanup then in the right window pane right-click on the SilentCleanup task and select Disable.
4.Close everything and reboot your PC to save changes.
Method 3: Try to Reset Thumbnail Cache Folder
Run Disk Cleanup on the disk where the Icons are missing their specialized image. Note: This would reset all your customization on Folder, so if you don’t want that then try this method at last as this will definitely fix the issue. 1.Go to This PC or My PC and right click on the C: drive to select Properties.
3.Now from the Properties window click on Disk Cleanup under capacity.
4.It will take some time in order to calculate how much space Disk Cleanup will be able to free.
5.Wait until Disk Cleanup analyzes the drive and provides you with a list of all the files that can be removed. 6.Check mark Thumbnails from the list and click Clean up system files in the bottom under Description.
7.Wait for Disk Cleanup to complete and see if you are able to Reset Thumbnail Cache Folder.
Method 4: Stop 3rd Party Software from Deleting Thumbnail Cache
If you frequently use CCleaner then you might be deleting thumbnail cache everytime you run CCleaner. In order to avoid that make sure to uncheck the option “Thumbnail Cache” when running the Cleaner.
Recommended:
Disable Auto Arrange in Folders in Windows 10 Manually Start Automatic Maintenance in Windows 10 Disable Automatic Maintenance in Windows 10 How To Change Default Programs in Windows 10
That’s it, you successfully learned How To Stop Windows 10 from Automatic Deleting Thumbnail Cache but if you still have any questions regarding this tutorial then feel free to ask them in the comment’s section.