Now Windows Driver Foundation might be present with a different name in Task Manager such as wudfhost.exe or User-mode Driver Framework (UMDF). So without wasting any time let’s see how to Fix High CPU Usage by WUDFHost.exe with the help of below-listed troubleshooting guide.
Fix High CPU Usage by WUDFHost.exe
Make sure to create a restore point just in case something goes wrong.
Fix High CPU Usage by WUDFHost.exe Method 1: Run Windows Update Method 2: Run System Maintenance Troubleshooter Method 3: Perform Clean Boot Method 4: Update Network Adapters Drivers Method 5: Run Driver Verifier Method 6: Disable NFC and Portable Devices
Method 1: Run Windows Update
Press Windows Key + I then select Update & Security.
Next, again click Check for updates and make sure to install any pending updates.
After the updates are installed, reboot your PC and see if you’re able to Fix High CPU Usage by WUDFHost.exe.
Method 2: Run System Maintenance Troubleshooter
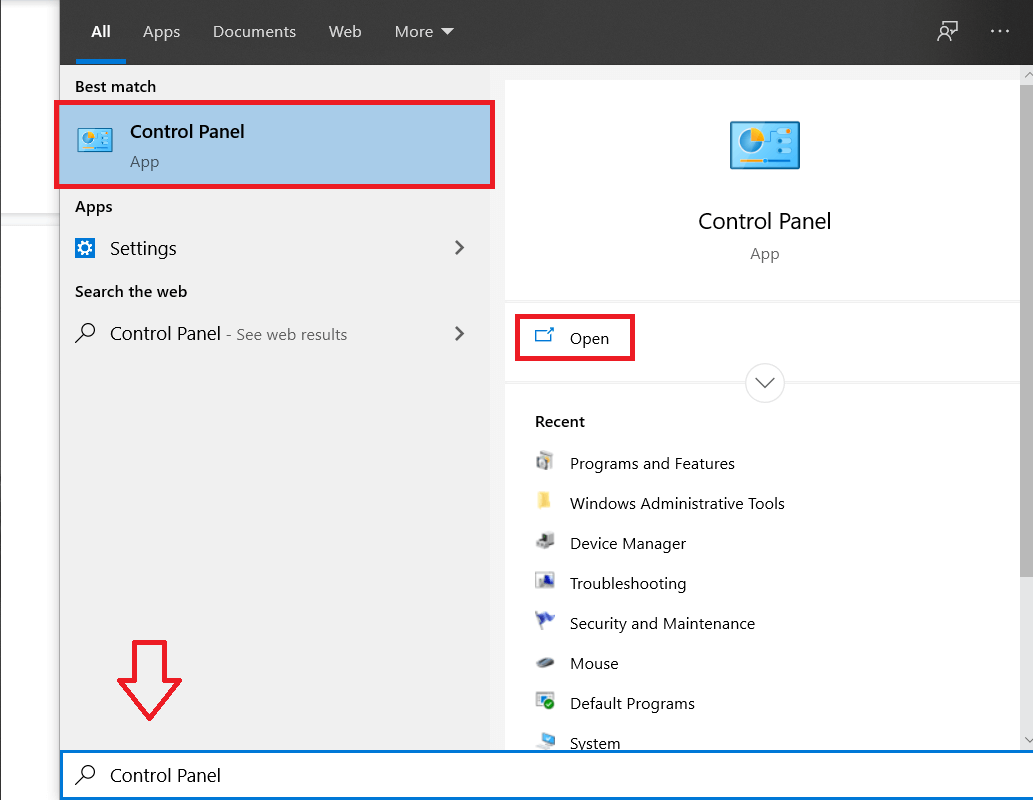
Search for the control panel from the Start Menu search bar and click on it to open the Control Panel.
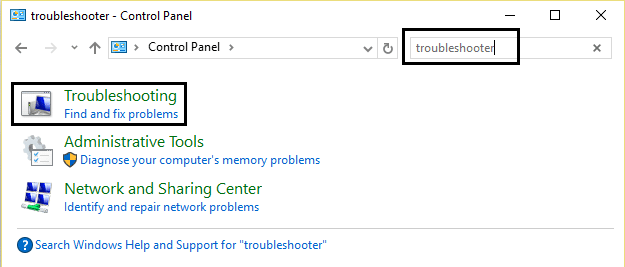
Search Troubleshoot and click on Troubleshooting.
Next, click on view all in the left pane.
Click and run the Troubleshooter for System Maintenance.
The Troubleshooter may be able to Fix High CPU Usage by WUDFHost.exe, but you need to run System Performance Troubleshooter if it didn’t.
Open Command Prompt. The user can perform this step by searching for ‘cmd’ and then press Enter.
Type the following command into cmd and hit Enter: msdt.exe /id PerformanceDiagnostic
Exit the cmd and reboot your PC.
Method 3: Perform Clean Boot
Sometimes 3rd party software can conflict with Windows and can cause the issue. To Fix High CPU Usage by WUDFHost.exe, you need to perform a clean boot on your PC and diagnose the issue step by step.
Method 4: Update Network Adapters Drivers
Press Windows Key + R then type devmgmt.msc and hit Enter to open Device Manager.
Expand Network Adapters then right-click on your wireless adapter and select Uninstall.
Reboot your PC to save changes and again open Device Manager.
Now right-click on Network Adapters and select Scan for hardware changes.
If the issue is resolved by now, you don’t need to continue but if the problem still exists, then continue.
Right-click on the wireless adapter under Network Adapters and select Update Driver.
Select “Browse my computer for driver software.”
Again click on “Let me pick from a list of available drivers on my computer.”
Select the latest available driver from the list and click Next.
Reboot your PC to save changes.
Method 5: Run Driver Verifier
This method is only useful if you can log into your Windows normally not in the safe mode. Next, make sure to create a System Restore point.
Method 6: Disable NFC and Portable Devices
Press Windows Key + I to open Settings then click on Network & Internet.
From the left-hand menu, select Airplane mode.
Under Wireless devices turn off the toggle for NFC.
Now press Windows Key + R then type devmgmt.msc and hit Enter.
Expand Portable devices and right-click on the device which you inserted and select Disable.
Close Device Manager and reboot your PC to save changes. Recommended:
Fix Windows Installer Access Denied Error 15 Ways to Speed Up a Slow Windows 10 PC Fix Selected boot image did not authenticate error Fix Volume icon missing from Taskbar in Windows 10
That’s it you have successfully Fix High CPU Usage by WUDFHost.exe but if you still have any questions regarding this post then feel free to ask them in the comment’s section.


![]()


